Summary:
This article describes a business use case of validating phone number using the Loqate connector and logging an error message for invalid phone number.
Pre-requisite:
-
User should have a working webMethods.io Integration tenant.
-
User should have a working Loqate and Salesforce CRM account.
Steps:
-
Login to webMethods.io Integration tenant and create a workflow.
-
Search for Loqate connector from the applications list.
-
Drag and drop the Loqate connector to the workflow palette.

-
Double click the Loqate connector icon in workflow pallet to configure the action.
-
In the action configuration screen, select ValidateAPhoneNumber action from the list.
-
Connect to Loqate by clicking the + icon to add a new account or select an existing account.
For more information on how to create Loqate account, check the following article.
Configuring Loqate account in webMethods.io Integration Workflow - Knowledge base - Software AG Tech Community & Forums -
In the next wizard, provide input for ValidateAPhoneNumber action.

-
Click Next, Test the action and Finish.
-
Configure the condition to switch the execution flow based on the ValidateAPhoneNumber output.
Success: Create the account in Salesforce.
Failure: Log the error message using Logger application. -
Follow below steps to configure success flow
a) Drag and drop Salesforce CRM application into workflow palette.
b) Connect Loqate application to Salesforce CRM, click on the same line and select Settings option.

c) Click Add condition followed by Add Filter, configure the condition as in below snapshot and Click Done.

d) Double click the Salesforce CRM connector to configure Create Accounts action in Salesforce.
e) Connect to Salesforce by clicking the + icon to add a new account or select an existing account.
For more information on how to create accountf) Click Next, followed by + to add an account in the input array.

g) Provide the input for the Create Accounts action.
h) Click Next, Test the action and Finish.
-
Follow below steps to configure failure flow.
a) Drag and drop Logger application into workflow palette.
b) Connect Loqate application to Logger, click the same line and select Settings.

c) Click Add condition followed by Add Filter, configure the condition as in below snapshot and Click Done.

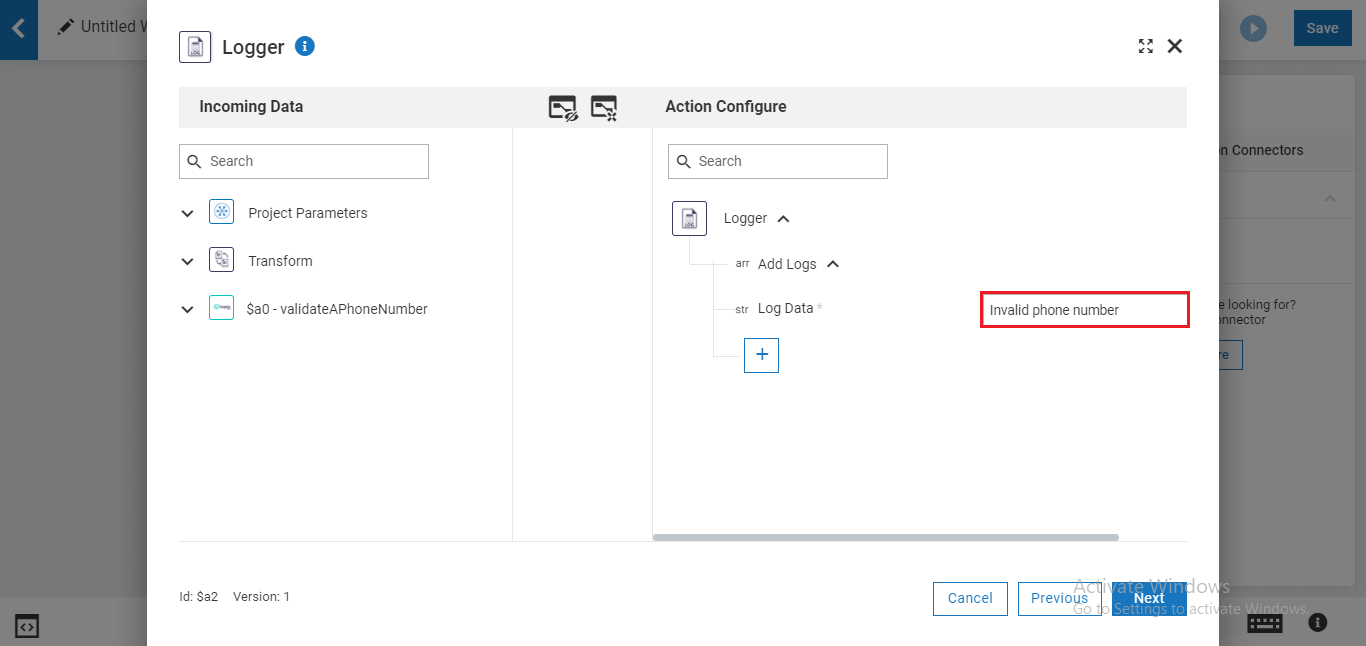
d) Double click the Logger to set the failure message.
e) Click Next and set the error message.

f) Click Next, Test the action and Finish.
-
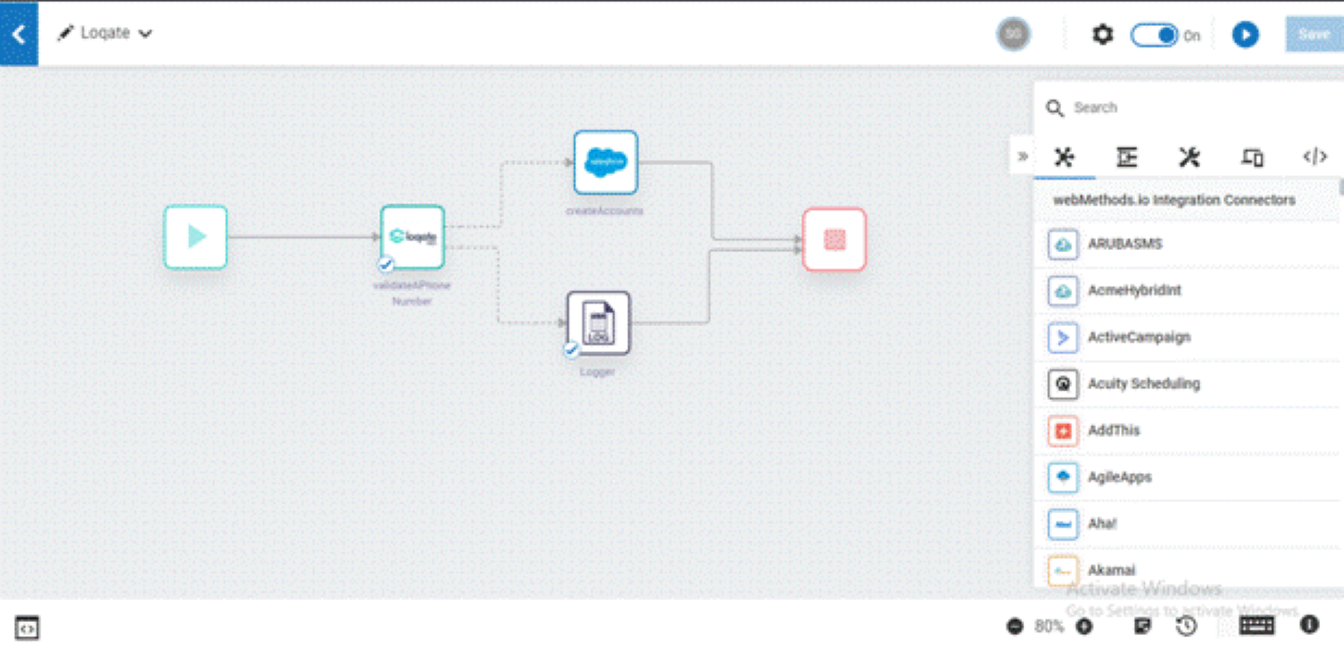
Save the workflow. A fully configured workflow will look like below.

-
Execute the workflow and verify the output.