Introduction
Thank you for checking out this article on webMethods.io. If you are a beginner and looking to start your journey in webMethods.io, you have come to the right place.
In this article, you will learn
- How to create a free trial account for
webMethods.io- How to build a new simple workflow from scratch
- Useful links and resources with videos , tutorials and documentation to carry on your journey from beginner to intermediate.
Steps to begin your journey with webMethods.io
Create a free trial account
-
To start, you need to create a free trial account at Software AG Cloud
-
Please click on “sign up for free” in the top right corner.

- On next screen, click on “advanced form”.

- Fill out the details along with the cloud region and environment name. As this is a free trial, it has limited cloud regions here. For customers, it can be provisioned on other clouds and regions. Please save environment name, username, and password.

- You will receive an email once the account setup is done. It usually takes less than 2-3 minutes.

-
Now please go to Software AG Cloud again and click on login.
-
Next screen, provide your environment name (you provided it in step 4). Click on next, then log in using your credentials.

- Once you log in, you are in your Software AG cloud dashboard. Initially, you will not have any products provisioned. You will see all Software AG cloud products under “other Software AG cloud products”. (Here only those products are listed for which a free trial is now available to you.)
Integration, API Gateway, developer portal, you can click on "start free forever". On the next page, read through the terms and conditions, and then again click Start Free Forever on that page.
When you want to use B2B or Cumulocity IoT, you can click on “start Free Trial” for those products.
Here are all the products available in Software AG Cloud - your gateway to Software AG cloud products

You will get more details about the free forever edition here.
webMethods.ioIntegration Free forever edition
webMethods.ioAPI Free forever edition
- It will take some time to provision your
webMethods.ioAPI gateway, Developer Portal and Integration products.

-
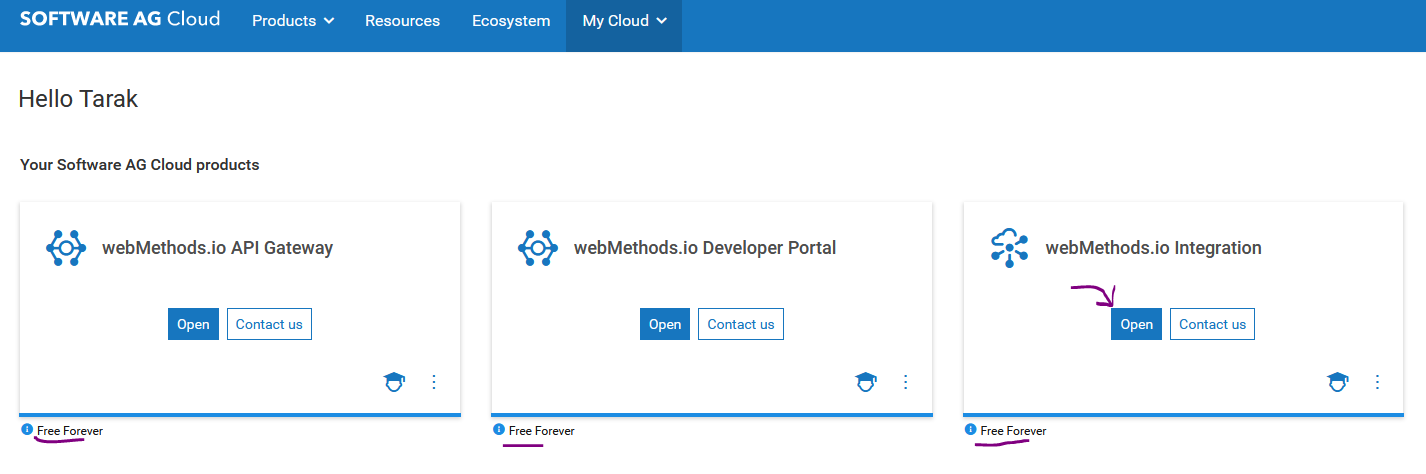
Once provisioning is done, you can see these products under “your Software AG Cloud products”. Provisioning normally takes 5–10 minutes.
-
Once provision is completed you can see for each product there is an “Open” button. You can open any of the products already provisioned. Let’s open
webMethods.ioIntegration.
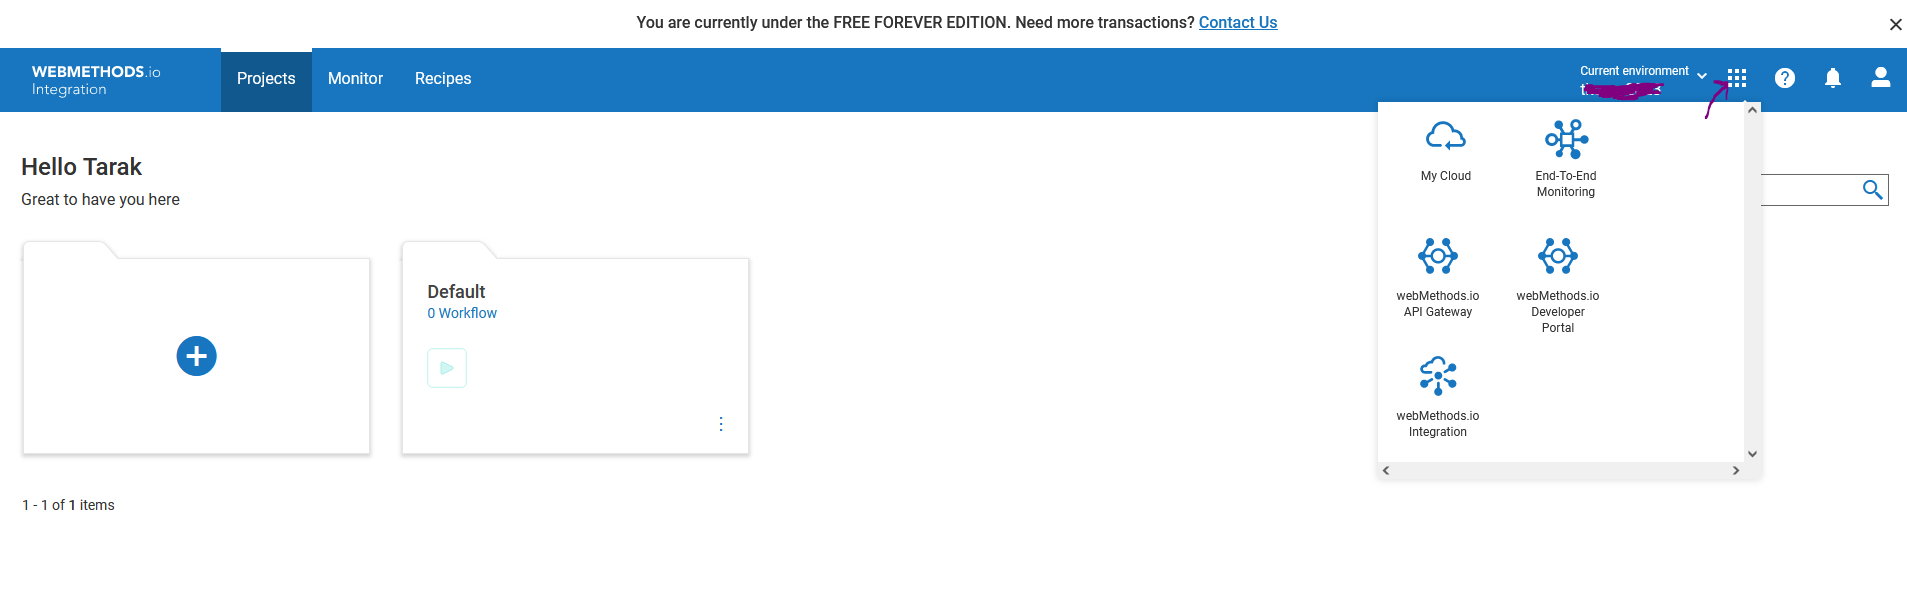
- After you open the
webMethods.iointegration, you can see the Projects, Monitor, and Recipes tabs. There are other tabs available in the licensed version, such as Messaging.
While you are on the
webMethods.ioIntegration product, you can switch to other products using the top-right corner launcher icon. You will see API Gateway, Developer portal, and Integration which are provisioned for you, as well as My Cloud and End to End Monitoring.
Build a new simple workflow from scratch
- Now in
webMethods.ioIntegration, let’s create a sample project. In the projects tab, click on the + icon to add a new project.

- Once you open the project, you can see the Integrations, API, Connectors, Configurations, and Deployments tabs. Under integration, you will find workflow. We will create a new workflow.

- New workflow can be created from scratch or from recipes provided. Let’s create from scratch.

- Now the workflow canvas will open. You need to name the workflow. On Canvas there are start and stop buttons. You can drag any connector available on the right to complete this workflow based on your use case.
webMethods.iohas more than 550 connectors to choose from. You can go through all connectors available here -webMethods.ioConnectors
In the top right corner, there are workflow settings and a button to activate or deactivate the workflow. In the lower right corner, there is a “proceed” button to have flow services also available for this project. We will use flow services later. Workflow is a no-code solution suitable for citizen developers without requiring extensive technical knowledge. Flow Services is a low-code solution that is more suited for integration developers who have a deeper understanding of coding.

-
Now let’s consider a simple scenario where we want to connect to NetSuite. Get customer details and send them to Mongo DB.
-
First, let’s search for the connector for NetSuite on the right side. Then drag the connector onto the canvas.

- For each connector, there is a “settings” option. Click on settings to provide action and connection details.

- You can select an action already available in the connector or click on the + icon to create a custom action based on your requirements. In this use case, let’s select queryCustomersByID.

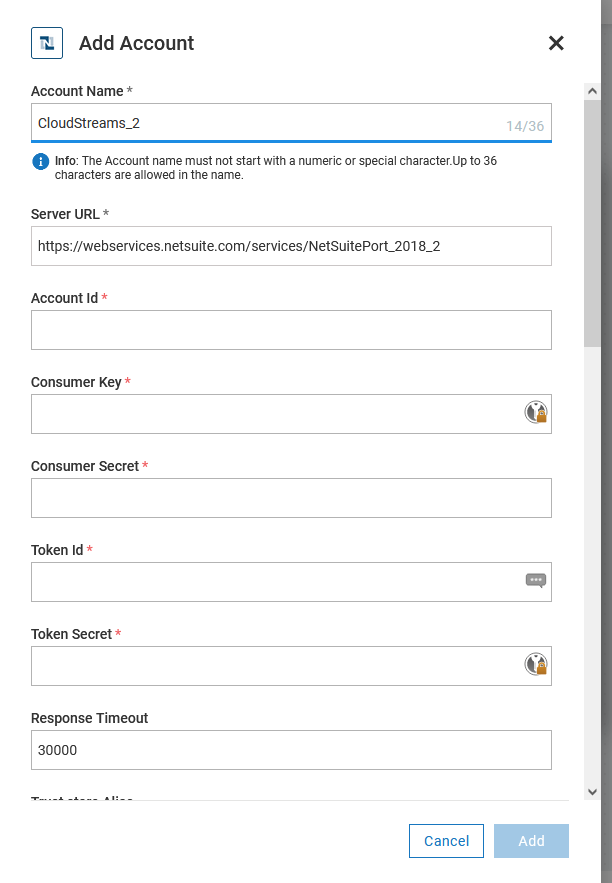
- Now we need to provide connection details for the NetSuite connector. Click on the + icon after connecting to NetSuite.

- It will open the connection details window. Here you need to provide NetSuite connection details and click “Add”.
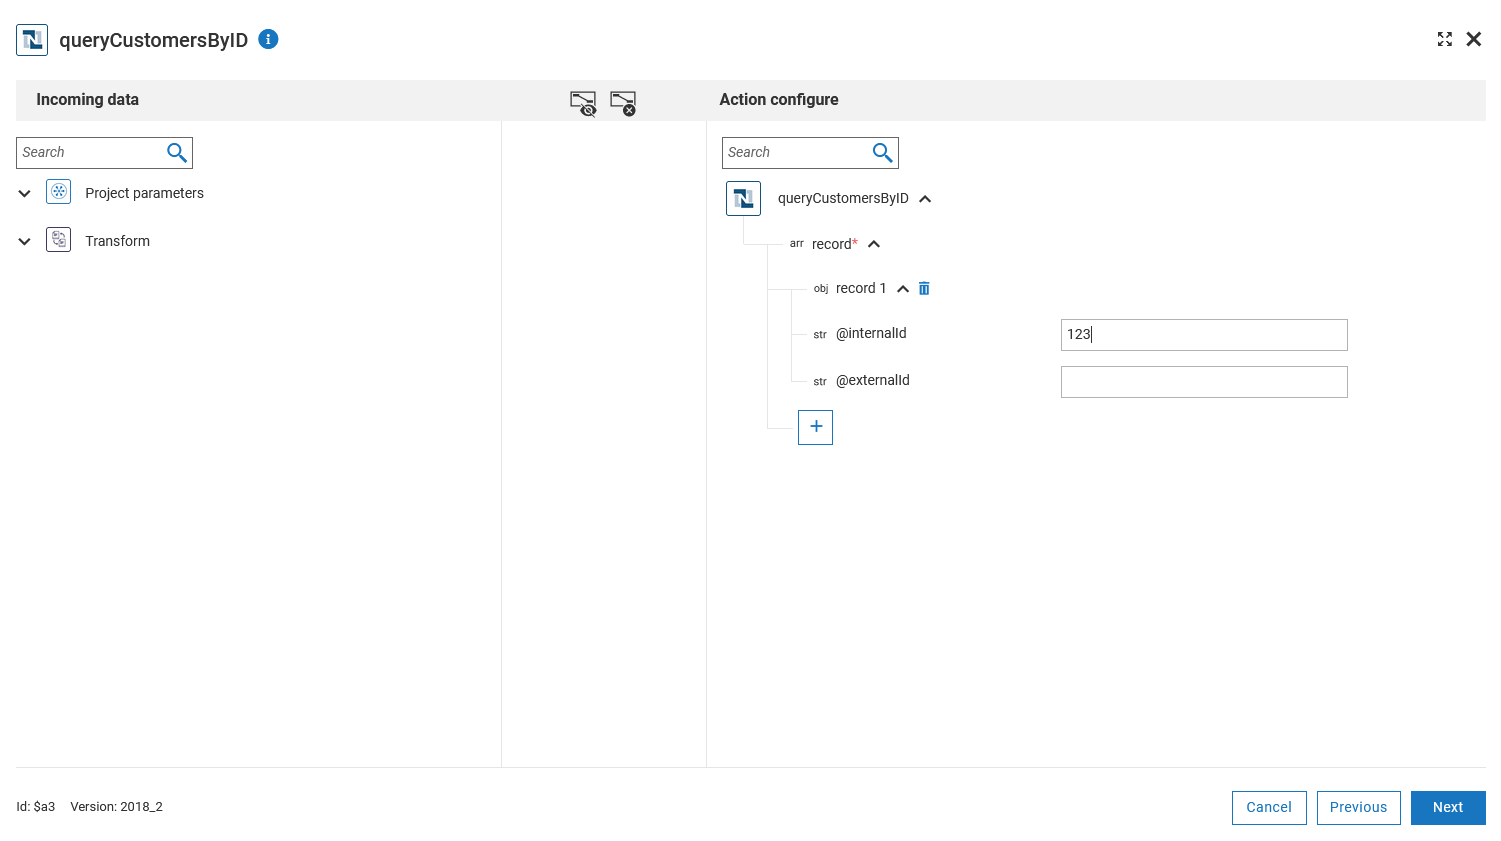
- On the next screen, it will show what input this action (queryCustomersByID) needs. Let’s provide the customer ID. I have provided “123”. Then click on “Next”
- In this screen, we can click on Test to check if it is working fine. It also shows what input is being passed. Workflow is a test-driven approach. So as we add steps, we need to test them so that the next step has the input structure already available for mapping or performing any business logic.

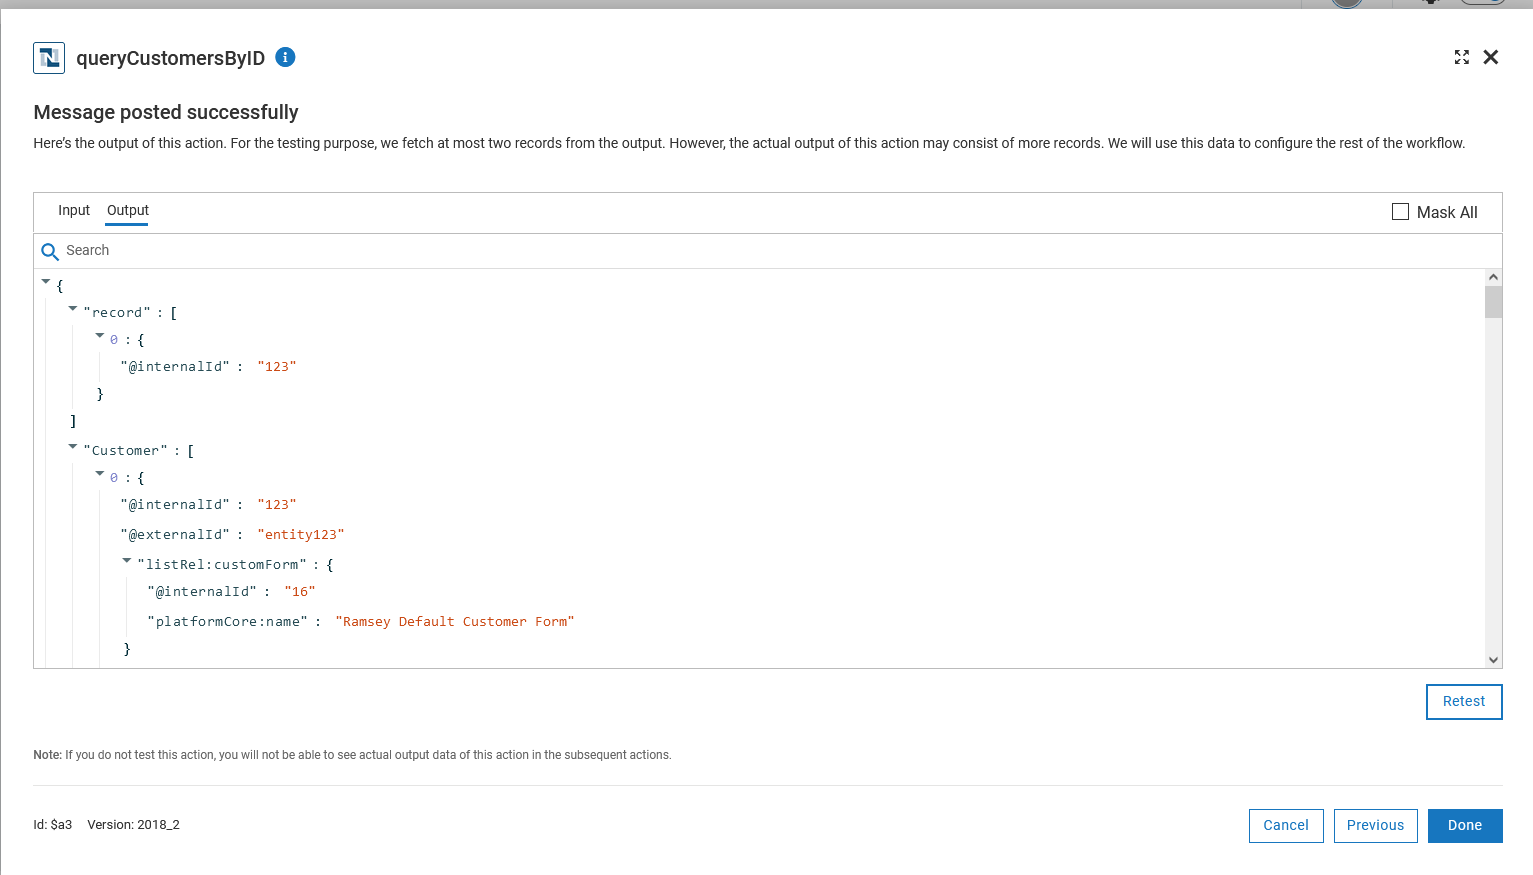
- As we test, we can see the output of this step. This also confirms a successful connection. If there is any error, it will display an error here. Click on “Done”.
- So we now have customer details from NetSuite. Next step, suppose we want to insert that customer record into MongoDB. So let’s search for the Mongo DB connector and drag it to the canvas.

- Go to the settings of the Mongo DB Connector (as you did in step 19). Select action. Here I selected the “create object” action. Then click on + sign on the right side of “Connect to Mongo DB” to provide connection details.

- On the next screen, provide connection details. There are two ways to provide connection details for MongoDB. Using “Connection Form” or “Connection String” Once details are provided, click on Add. It will check if the account is valid, and for accounts with correct details only, it will save the account. Otherwise, it will give an error.

- On the next screen, it will open the mapping screen for this step. On the left side, you can see all of the fields and data structures that were output from the previous step and input into this step. The right-hand side is the input structure for the MongoDB create object operation.

- Then you can test, as we did for NetSuite. As mentioned previously, workflow follows a test-driven approach.

- Once the test is successful, we can see the output and then click on Done.

- Then connect MongoDB output to the end step. This completes the workflow. So this is a very simple scenario, where workflow first goes to NetSuite to get customer details and then saves those details in MongoDB.

- Click on “Save” in the upper right corner, followed by the run icon. When a workflow runs, it shows how each step is being executed.

- After execution, at the left bottom corner, we can see the execution history. It will save all execution details for the workflow, along with how much time it took to run for each step. It also saves the input, output, and error on each step.

- On the below screenshot, you can see Input of the MongoDB creates Objects steps during this execution.

- On the top right corner, if you click the settings of this workflow, you can see Accounts, Parameters, and Execution Settings. Accounts are used by this workflow for connectors. Parameters to store name-value pairs.

- Below are the execution settings for this workflow. We can set retry, max workflow runtime, save status, and logs. You can get more details here Workflow Settings

- The version history for this workflow is displayed in the bottom right corner. You can open any of the old versions and restore that version.

Useful links | Relevant resources
Here are excellent links to continue your journey to learn webMethods.io Integration:
Software AG Developer portal, Learning Portal and YouTube Channel
Please watch the video tutorials available on the Software AG Learning Portal and YouTube channel.
Software AG Learning Portal is a comprehensive resource for learning about webMethods.io and other Software AG Products, with a range of courses and training materials most are available for free. You can earn Software AG Badges (Credly digital badge) also at different level (Associate, Professional, Expert) from Learning portal.
The YouTube channel features a variety of informative and engaging five-minute videos that provide basics and advanced tutorials on various webMethods.io features and capabilities
webMethods.ioIntegration Developer Basics - YouTube playlistwebMethods.ioIntegration Advanced Tutorials- YouTube playlist
To learn more about webMethods.io, Please go to Software AG Developer portal and it’s learning resources.
Beginner Guides and Popular use cases
Here are some more beginner guides (some are links to the previous videos). Please go through the links for popular use cases:
webMethods.ioproduct documentation
Once you have completed all the beginner guides above you can refer to product documentation on specific queries:
When you are inside a specific product’s documentation, you can switch to other product documentation using the launcher on top right corner. It is same experience as you switch different product on Software AG Cloud.

webMethods.ioError handling best practices for webMethods.io Integration
webMethods.ioDemos
Here is a youtube playlist of webMethods.io Demos ( Software AG’s webinar series focusing on powerful Integration and API strategies to help organizations become innovation ready):
Integration guidelines, GitHub repositories
webMethods.ioCI/CD
This article shows how to design and set up an automated CI/CD process and framework for webMethods.io using the inbuilt APIs (or CLI):
Collaboration
Platform to collaborate with other users, Software AG, and Partners:
Product roadmap 2023
Do you want to know the product roadmap for 2023? Please watch the recording of this webinar:
Software AG container Registry:
Best Practices and Architecture discussion:
webMethods.ioAPI, AppMesh
YouTube playlist with a lot of videos to learn webMethods.io API, AppMesh:
webMethods.ioB2B
YouTube playlist to learn webMethods.io B2B:
- B2B Essentials DevBytes youtube playlist
- Hybrid B2B: Bring your Business to Business platform to the cloud
webMethods.ioMFT
Documentation, YouTube video to learn webMethods.io MFT:
Connector Builder- Build your own connector for
webMethods.io
webMethods.io has more than 550 connectors. But as there are many SaaS applications, it’s possible you will need additional connectors. Software AG provides a connector builder platform to build your own connectors using two options. You can build new webMethods.io connectors in a couple of hours:
- webMethods Connector Builder - Build your own
webMethods.ioConnecor using Node.js CLI - Connector Builder - Build your own connector using webMethods CloudStreams Connectors
webMethods.ioEmbed
Have you heard about the embedded integration platform? Check out this new unique webMethods.ioproduct from Software AG:
webMethods.ioEmbed- embeddable iPaaS which allows you to embed integrations with third-party apps into your application- Intro to
webMethods.ioEmbed - Automate and embed ChatGPT in any app with
webMethods.io
webMethods API Control Plane
Customer Stories
How customers are benefited from Software AG products Check Customer success stories: