Table of Contents [-]
- 1 Prerequisites
- 2 Step 1: Create a File Polling Directory Structure
- 3 Step 2: Create an XML File
- 4 Step 3: Create a Service to Process the XML File.
- 5 Step 4: Configure a File Polling Port
- 6 Step 5: Configure the Flow Service to Process your Dropped File.
- 7 Step 6: Test your File Drop Solution.
- 8 Conclusion
Duration: 15 - 20 minutes
In this tutorial you will drop an XML file into a directory and configure a File Polling port to pick up that file and pass it to an Integration Server service to be processed. This is important ESB functionality for processing files, for example another process or external partner may have sent a file to a directory via FTP. With this capability we can automatically respond to the event of a file being created or moved.
Prerequisites #
· The only prerequisite is access to Integration Server, a browser and the Designer IDE.
Step 1: Create a File Polling Directory Structure #
· In this step: You will create a directory structure which will be used for automatically picking up files.
· In Windows Explorer, navigate to the C:\ directory. Create a new Folder called FileDropsTutorial. Under this folder create 4 folders named completed, errors, inbound and working. Your folder should look like this:
 |
Step 2: Create an XML File #
· In this step: You will create an XML file which will be picked up via the Integration Server file polling capabilities.
· In Windows Explorer, navigate to the C:\FileDropsTutorial directory that you just created. Right click in this directory and create a new text Document. Name the text document CustomerOrder.
 |
Open CustomerOrder in Notepad and copy/paste the xml structure below into the text document, Save and close it. This is the CustomerOrder XML consisting of Customer Number, Product ID, and Fulfillment Method attributes.
<?xml version="1.0"?>
<CustomerOrder>
<CustomerName>John Smith</CustomerName>
<ProductID>187</ProductID>
<FulfillmentMethod>delivery</FulfillmentMethod>
</CustomerOrder>
Your directory structure should now look like this:
 |
Step 3: Create a Service to Process the XML File. #
· In this step: You will create a service in Integration Server to process the file when it is dropped.
If you already have Software AG Designer started, just make sure you are in the Service Development perspective. If this is the first time starting Software AG Designer, open it from the Start Menu -> All Programs -> Software AG -> Tools -> Software AG Designer 9.5.
· In the Software AG Designer Welcome page, click on the Open the Service Development Perspective link:
· In the Package Navigator view, create a new package called FileDropTutorial. Under the FileDropTutorial package create a folder called FileDropTutorial. Under the FlatDropTutorial folder create 2 folders called docs and services. It should look exactly like the following:
 |
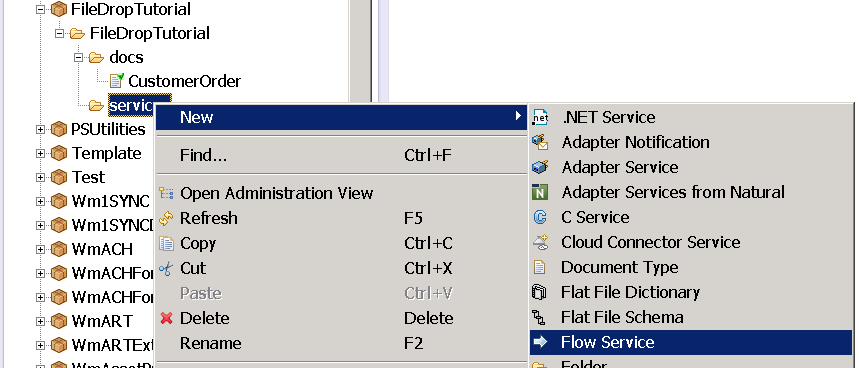
· Create a new Flow service to process our incoming file. Right click on the services folder and new Flow Service. When the next window opens name the new flow service processCustomerOrderFileDrop and click Finish.
Step 4: Configure a File Polling Port #
· In this step: You will use the IS Admin tool to configure a new File Polling Port.
· Open a browser and in the browser URL address window enter localhost:5555 uid: Administrator pwd: manage. This will launch the Integration Server Administration user interface. On the left expand the Security section and select Ports, then in the Ports work area select Add Port.
· Select the webMethods/FilePolling option and click Submit.
 |
· Configure the File Polling Port as shown below and click Save Changes at the bottom. To fill in run service as user option click the magnifying glass and select Administrator. To fill in Processing Service, go back to Designer and select the processCustomerOrderFileDrop service and copy (cntl C). Paste (cntl V) into the Processing Service field in your browser.
· At this point our Port is created but we need to relax the default permission structure on the port for testing. In the Access Mode column of the Tutorial port click Deny.
· Click the Set Access Mode to Allow by Default Link, then OK, then Return To Port List link.
 |
· We have now configured our port and relaxed security, so now we can enable it for polling. Click the No link under enabled to toggle the port to YES (enabled). If the port will not enable at this point go back and double check your configuration .
Step 5: Configure the Flow Service to Process your Dropped File. #
· In this step: You will create a flow service to process the CustomerOrder XML file that we will drop into the inbound directory when we test in the next step.
· In Designer, go to your ProcessCustomerOrderFileDrop service that we created earlier. Select the Input/Output Tab at the bottom of the work area. Drag an Object object from the Pallet into the Input area as shown below, and name it ffdata. ffdata will now be available to us in the pipeline when we execute our first step. ffdata will contain the contents of the file we drop.
· Under the WmPublic package, pub folder, io folder select the streamToBytes service and drag it into the work area. Select the Pipeline tab and map ffData to stream. bytes is already mapped to bytes.
· Drag two more services from the WMPublic package into your workarea. First string.bytesToString, then flow.debugLog. Highlight the debugLog step in your processCustomerOrderFileDrop service and then select the Pipeline tab. Map string to message as shown below. Save your service (cntl S).
Step 6: Test your File Drop Solution. #
In this step: We will drop a file into our listening folder and it will be processed by our service and be written to the server log.
· Copy (not move) the CustomerOrder file we created earlier. Open the inbound folder and paste the CustomerOrder file. It should disappear within 5 seconds (we configured a 5 sec polling interval earlier).
 |
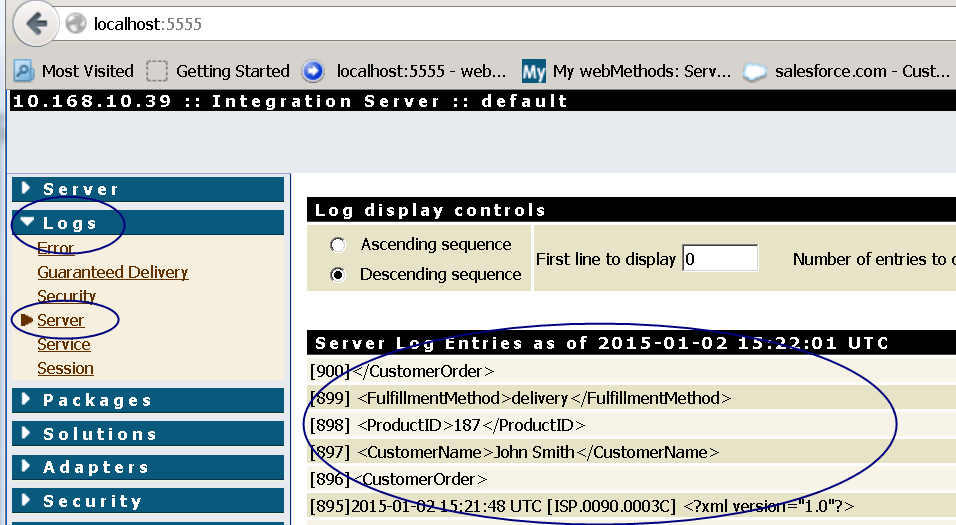
· Go back to your browser and go to IS Admin localhost:5555. Expand the Logs section and select Server. You should the XML data from the file you dropped in the Server log.
Conclusion #
You have configured a File Polling Port such that anytime a file ends up in a specified directory, that file will be picked up the by the File Polling Port and passed to a specified service as input. This is important ESB functionality for processing files, for example another process or external partner may have sent a file to a directory via FTP. With this capability we can automatically respond to the event of a file being created or moved. In this example we dropped and processed an XML file, but the file could have been any format i.e. flat file (csv, fixed, variable, etc), EDI, JSON, etc. We also only copied the contents of the XML to the Server log via our processing service but we could have mapped and passed that data to any backend application e.g. ERP, data warehouse, etc.
To import the solution of this tutorial download End FileDropTutorial.zip and follow the directions in the Import an IS Package tutorial.
Read in this series:
- webMethods Flow Tutorial - No.1 Create an IS Package and Folders
-
webMethods Flow Tutorial - No.2 Create and Run a Flow Service
-
webMethods Flow Tutorial - No.3 Create Document Types
- webMethods Flow Tutorial - No.4 Create a LOOP Operation
-
webMethods Flow Tutorial - No.5 Create a BRANCH Operation
- webMethods Flow Tutorial - No.6 Create a SEQUENCE Operation
- Import an IS Package
-
File Drop Tutorial - Current tutorial
- Flat File Processing Tutorial
-
webMethods JDBC Adapter tutorial - Create a JDBC Adapter Service
-
webMethods SAP Adapter Tutorial
- Integrate with Salesforce.com using the CloudStreams Adapter


