OAuth Custom Rest Connector
This article shows how to create a custom rest connector in webMethods.io to get an access token without using the default OAuth account management and how to configure keycloak server with client_credentials.
Use-case
If you are integrating with Custom Cloud Rest Application and if the OAUTH Provider for your custom application generates a token with considerably small expiry and there is a need to generate the access token for every session (or service execution) instead of refreshing token on expiry, as refresh on expiry on each new session (service invocation) will be expensive. In such cases, we will need to create a connector or Cloud Integration (Flowservice) to get the access token instead of using the default OAuth Account management of the connector.

As an example, we will use Keycloak as an OAUTH provider to showcase this use case.
Prerequisite
- Pre-installed keycloak server. If you need to create your own instance, you could easily spawn one docker or k8s instance from “keycloak packaged by bitnami”. Refer Helm Charts to deploy Keycloak in Kubernetes
Topics
-
Creating realm and client in keycloak and configuring them.
-
Test to retrieve a token using Postman
-
webMethods.io
3.1. Creating a custom rest connector & and an account
3.2. Creating resources & operations for getting token
3.3. Creating FlowService to get the token
Steps
Creating and configuring realm and client
- Log in to keycloak “Administration console”.

- Login.

- Create a realm. (name: test_realm)
- Create a client (name: test_client), with configs as shown below.


Note: Select Use refresh tokens for client credentials grant in Open ID Connect Compatibility Modes
This could be important in some cases, if this is not selected refresh token will not be sent along with the token response.

Test to retrieve token using Postman
- Create a POST request with 4 form encoded parameters, grant_type, scope, client_id, client_secret and with url http://<<KEYCLOAK_SERVER>>:<<PORT_NUMBER>>/realms/<<REALM_NAME>>/protocol/openid-connect/token as below.

The result will contain token details, like access_token, refresh_token, token expiry, refresh expiry etc. We will use the generated token to access the application resource.
webMethods.io
Creating custom rest connector
It’s not mandatory to create a Rest Connector, you could directly use http invoke as well. But in general when you have many resources hosted in an application, it is better to use Custom Rest Connector, instead of many separate https calls
- Create / Open your project in the IO tenant.

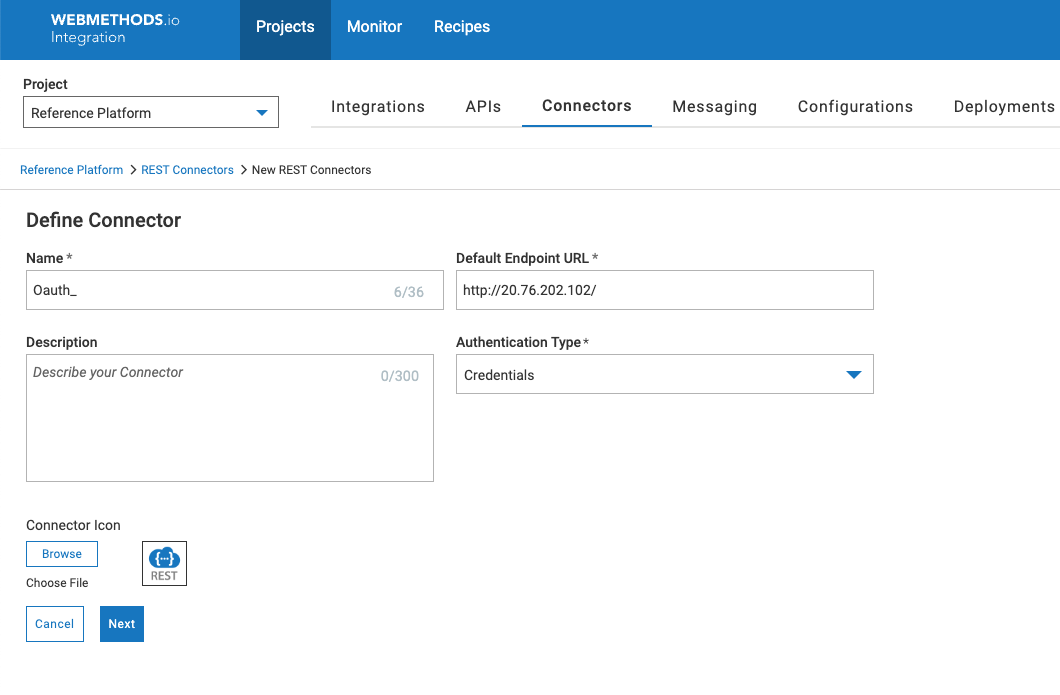
- Navigate to Connectors > Rest and click on Add Connector. provide name, URL(http://<KEYCLOAK_SERVER:PORT/>) and select Credentials as Authentication Type and save
- Navigate to Connectors, select the created connector, and click on Add Account. Select Authorization Type as none and the rest could be left default.

An account could also be created after resources. But we need to have an account created before we create any operation.
Creating resources & operations for getting token
- Click Add Resource with name and Path (realms/{real_name}/protocol/openid-connect/token).
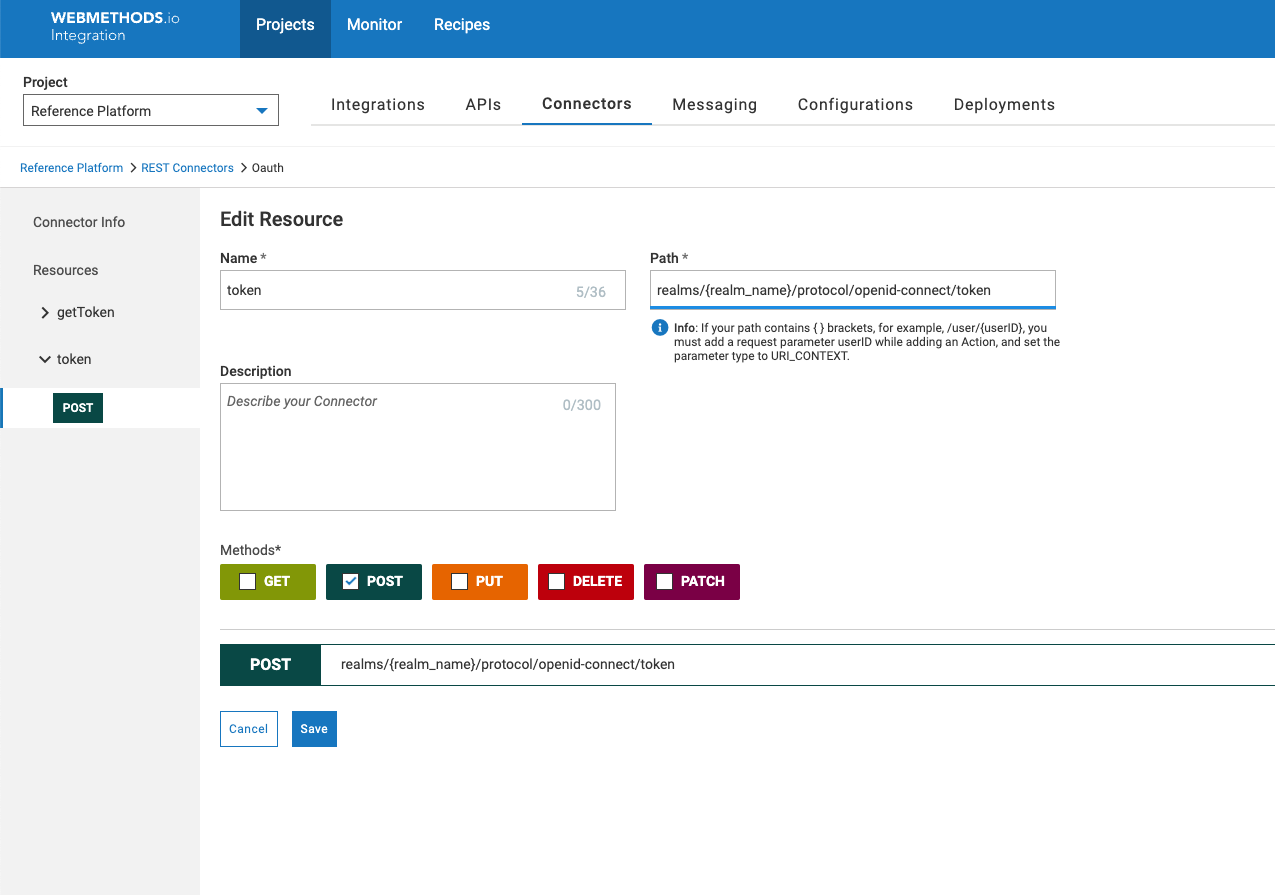
We have made the realm_name as a URL_CONTEXT parameter as this could change depending on the configuration of the OAuth Provider.
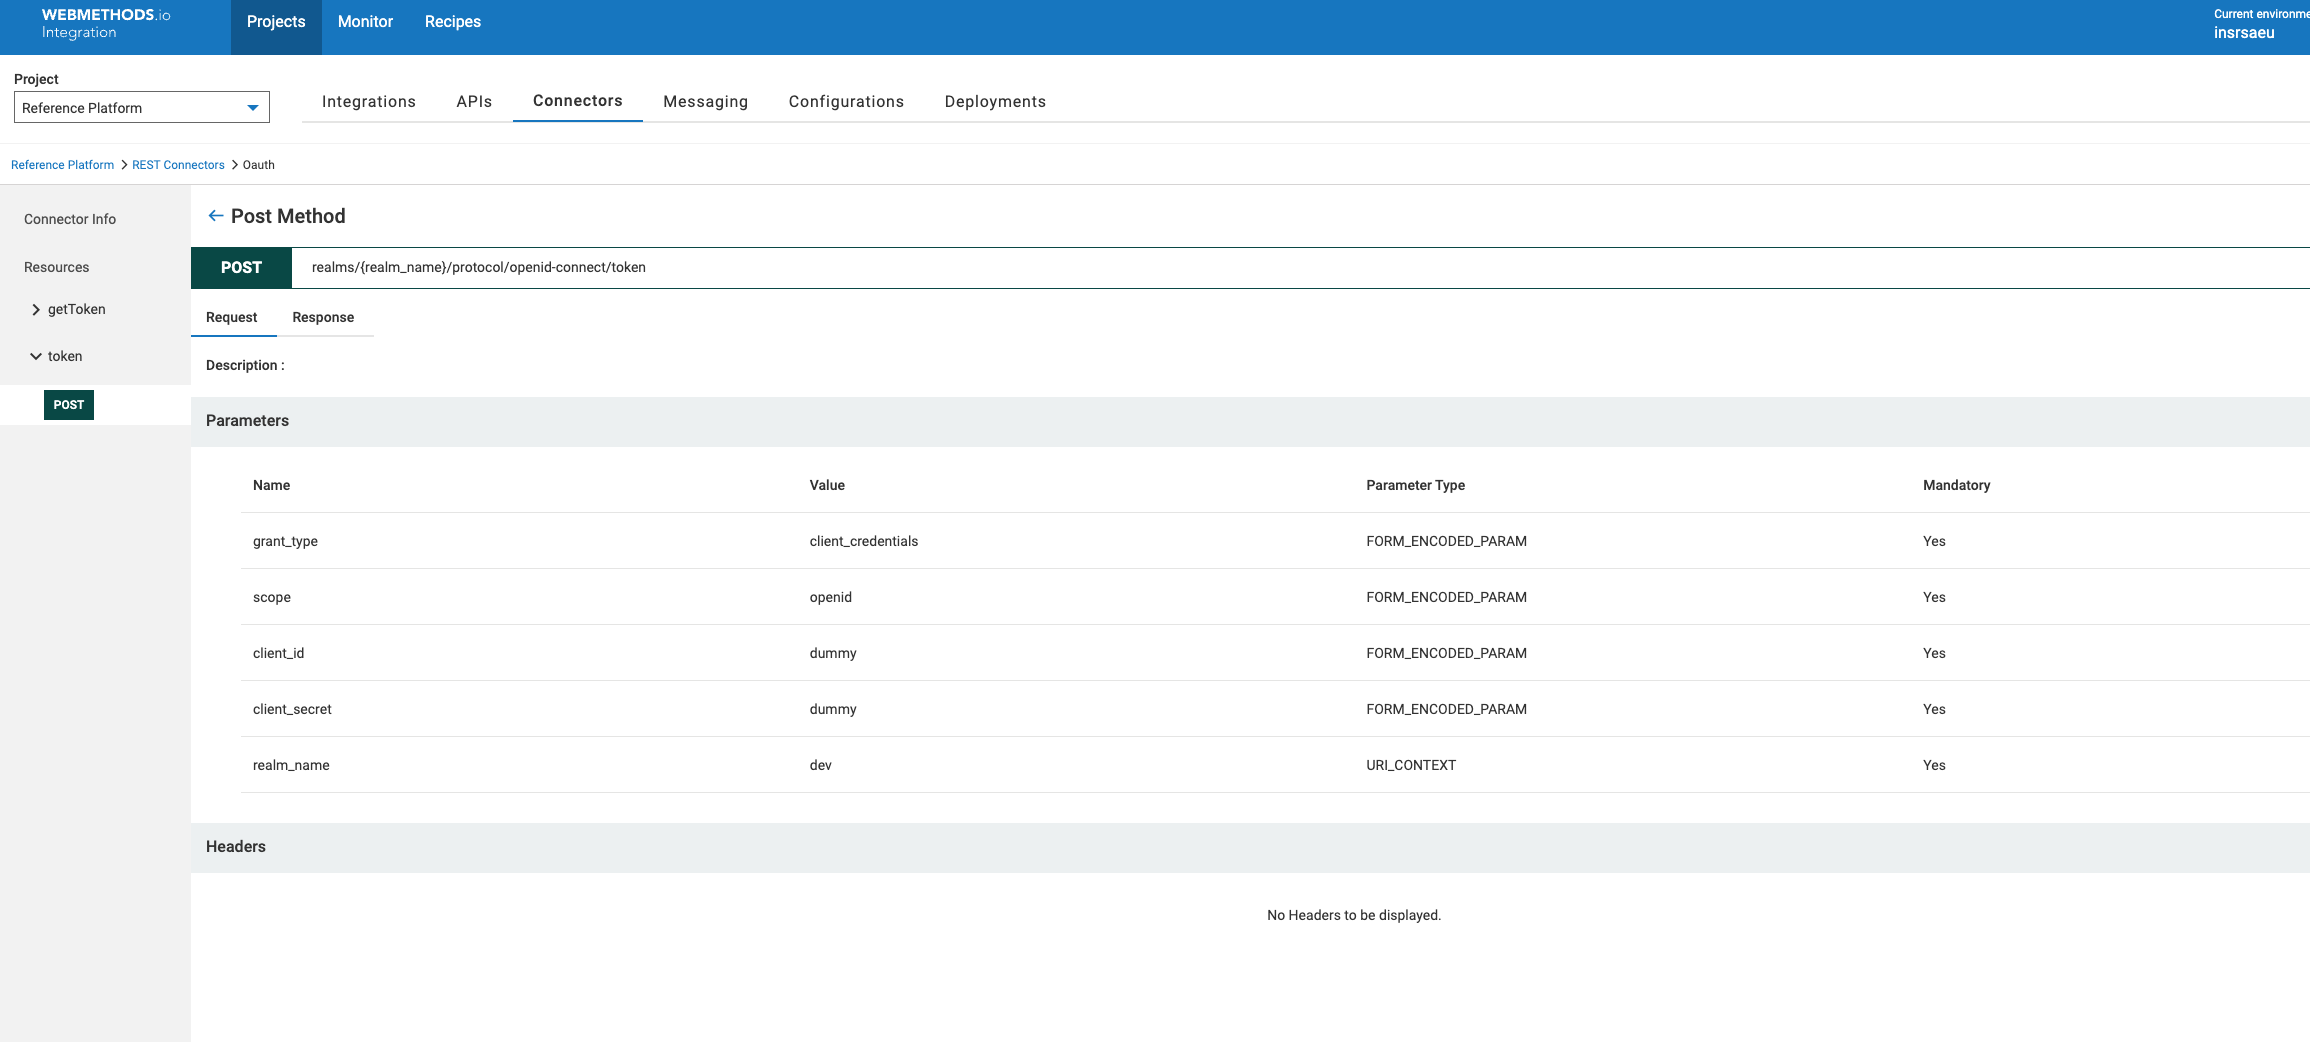
- Add POST as the method and add 5 parameters, out of which 4 of them as FORM_ENCODED for grant_type, scope, client_id, client_secret and 1 as URL_CONTEXT for realm_name.
-
Add response body for HTTP range 200-299 and click on + for Document Type. Provide a name and click on Load JSON and then copy the JSON response from Postman results (above).
-
Add another response body for HTTP range 400-599 for Error, and select the Error check box.


- Navigate to Connectors, hover over the created connector, and click Operations.
- Click Add Operation, provide a name (example: getToken), select the created account, and save it.

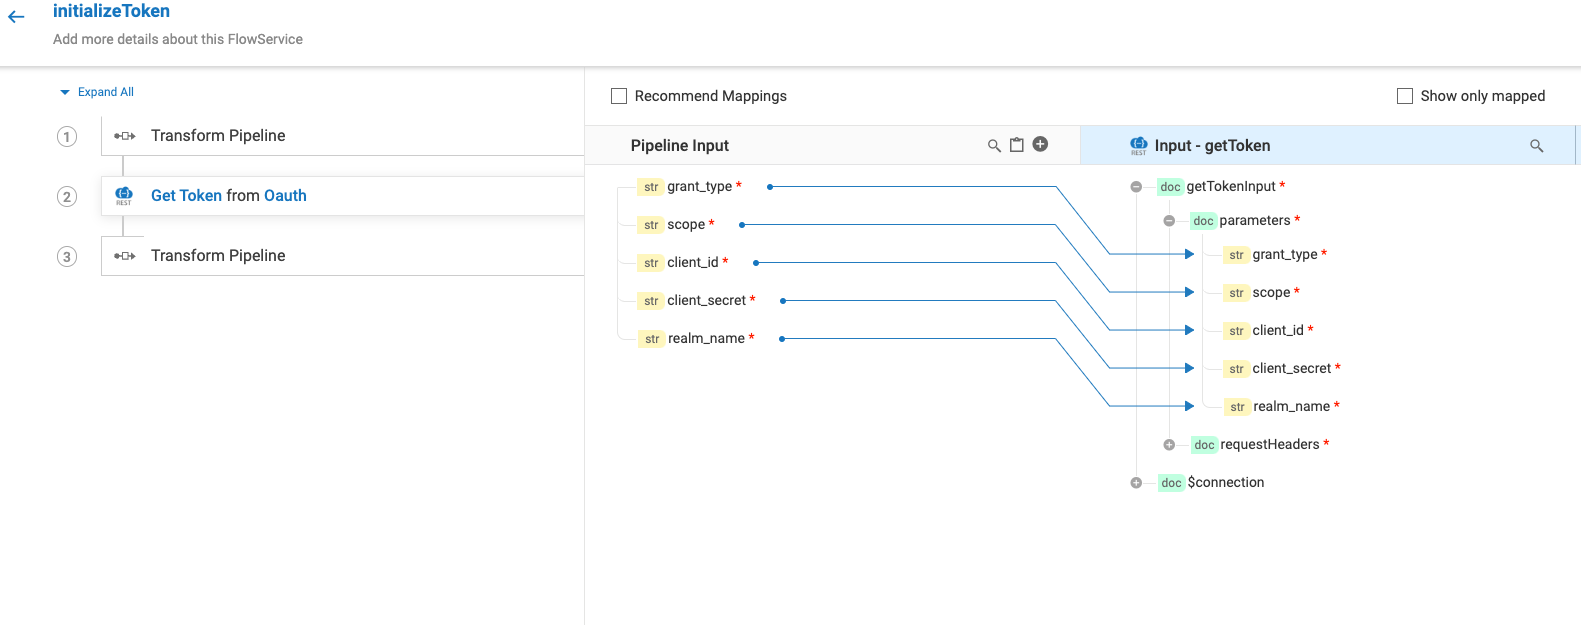
Creating FlowService to get the token
We will use the above-created connector and try to retrieve the token in a Flowservice, this step is not mandatory for token creation, rather just shows how to retrieve the token. Also, it will assist in exporting/importing the whole solution including the connector.
- Navigate to Integrations > FlowServices and click + to add new Flowservice

-
Add a Transform pipeline and add 5 pipeline variables for request parameters.
-
Instead of hardcoding the values, we have defined these in Reference data and retrieved them from there.

- Now invoke the operation we created and pass the above stream to the body
- Save & Test your FlowService

Useful assets
You can find useful assets and more guidance at OAuth Custom Rest Connector - GitHub project.