Introduction
Every IoT-Project includes some sort of Integration. This can vary in form and complexity. For example, you may use a Microservice to automatically update another system whenever a new Alarm is created. Equally, Integration may take the form of a simple script to do bulk import or export of data. Instead of building complex software solutions to expand your IoT use case, build it with webMethods.io Integration.
This article builds upon Stefan Witschel’s article Data integration options with Cumulocity IoT and dives deeper into System Integration using webMethods.io and our new Cumulocity IoT Connector.
You may also wish to read the article on using the webmethods.io Cumulocity Trigger. Using the new Cumulocity Trigger will provide a good entry point for a Cumulocity IoT Integration.
This Knowledge base Article describes the necessary steps to use the new Cumulocity IoT Connector within webMethods.io Integration and create powerful integrations with it.
Let’s Go!
Prerequisites
- A webMethods.io integration cloud Tenant. Try the free trial!
- A Cumulocity IoT cloud tenant. Try the free trial!
- A user with “Application management”-Role in the Cumulocity IoT tenant.
Basics
To understand the use and functionality of the new Cumulocity IoT Connector, we’ll start by clarifying some basic information. Let’s start with the fundamentals and use that to build an example integration.
What is webMethods.io Integration?
webMethods.io is an iPaaS (Integration Platform as a Service) by Software AG. It bundles the webMethods Suite in a cloud-based platform. Specifically, we are using webMethods.io Integration. It leverages the power of the Integration Server and Lambda-functions to allow businesses to integrate different applications and data sources. With webMethods.io Integration, it’s easy to automate processes, and manage and monitor all integrations from one place.
What does the connector do?
A connector in an iPaaS (Integration Platform as a Service) is a piece of software that enables different systems or applications to communicate and exchange data with each other. It basically functions as a REST-Client to a specific System.
Therefore the new Cumulocity IoT Connector is aware of the Cumulocity REST-Endpoints and their data-format. This enables the platform to perform REST-Requests to a Cumulocity Backend.
How is it Built?
The Connector is built using the Cumulocity OpenApi-File. We use our OpenApi-Generator to generate the Connector-Project. So in the best-case scenario, the Connector should just reflect the Specification of the API in the OpenAPI-File.
Therefore the action names in webMethods.io are taken from the OpenAPI. So it is useful to check with the OpenAPI while building the Integration since the specification includes helpful information about the endpoints.
How does the Connector authenticate with Cumulocity?
The new Cumulocity Connector comes with a custom Authentication Method.
The Authentication is done in 3 steps:
- Authenticate using basic Auth of a User with “Application Management”-Role.
- A new Microservice in Cumulocity is created, which has all the roles that the connector needs.
- A Service user for this microservice is created and then used within the connector for all requests.
![]() These Steps are all performed by the Connector itself. So the user only needs to create a Connection using their Cumulocity-user with the “Application Management”-role.
These Steps are all performed by the Connector itself. So the user only needs to create a Connection using their Cumulocity-user with the “Application Management”-role. ![]()
We choose this form of authentication because:
- The Connection will persist, even when the creating user is deleted or the password is changed.
- The Connection is manageable. If wanted the microservice can just be deleted and webMethods.io will no longer have a connection to the Cumulocity tenant.
Using the new Cumulocity Connector
After logging in to your webMethods.io Integration and creating a new Workflow or FlowService, the Connector can be used. Just search for “Cumulocity IoT” in the search bar and chose the connector:

Creating a connection to Cumulocity
The webMethods.io Integration: create an account for a connection to Cumulocity IoT article by Frédéric Joulin provides the necessary explanations about creating a connection in webMethods.io. This process can be used for Trigger and Connector and connections are shared between them.
Building a System integration with webMethods.io Integration and Cumulocity IoT
As a demonstration, we will build a small Integration Workflow using the Cumulocity IoT Connector.
The Integration consists of three steps:
-
- Get all critical and active Alarms from Cumulocity.
-
- Loop over the Alarms.
-
- Get the Managed Object for each alarm.
Getting Started
- First we will log into our webMethods.io tenant and create a new Project
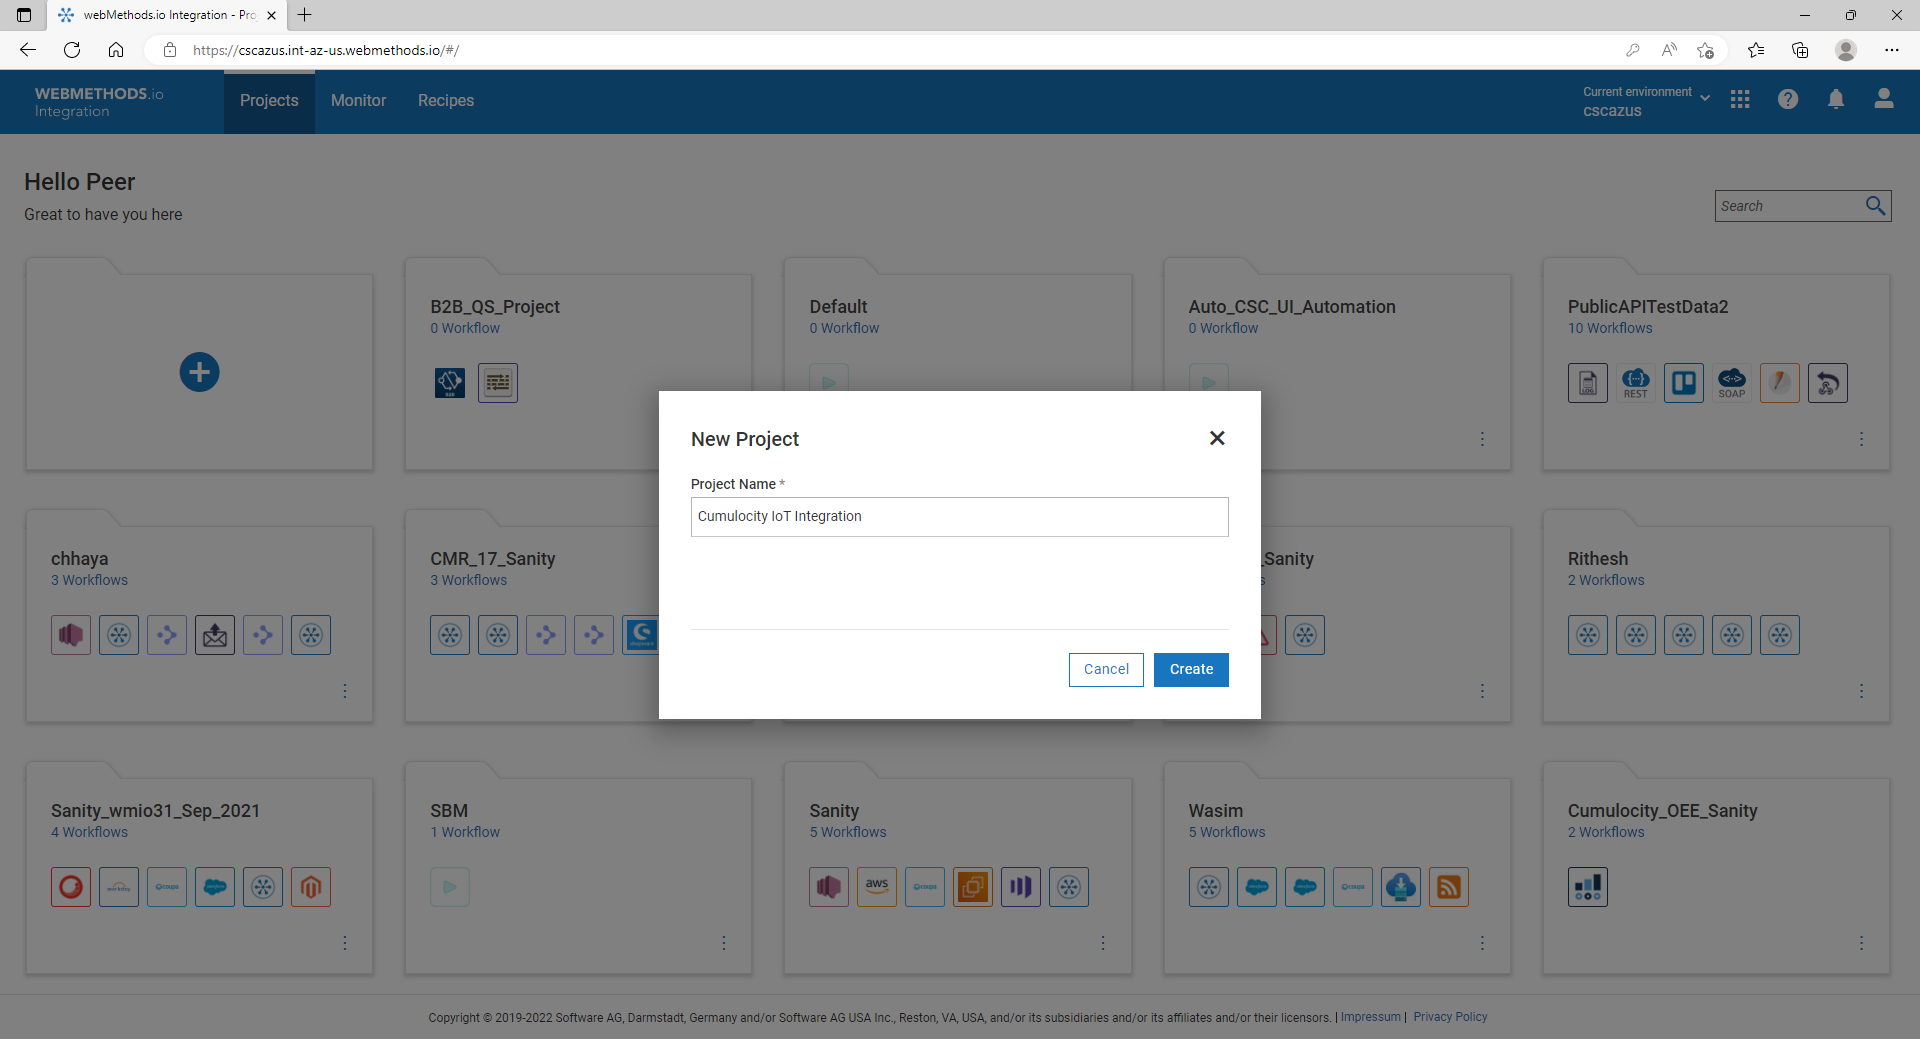
-
Create a new Workflow or FlowService
Now inside our project, we can go ahead and create a new Workflow or FlowService. For this example we will work with a Workflow. Therefore we just click the “new Workflow”-Button. -
We want to add the “Cumulocity IoT”-Connector from the Connectors list.
- Inside the Connector we will pick our Action and create a connection:

The Connection will look similar to this. Just enter the Server URL of your Cumulocity tenant and your user credentials. The “Cumulocity Application Name” holds the name of the microservice which will be created within your Cumulocity tenant.

After entering all the Details, you can press “Add” and the connection should be added successfully.
- Let’s configure the action and test it. Just follow the steps in the animation below.

This run should output some Alarms of our Cumulocity instance.
- Looping over all alarms
Next, we are going to use the Loop Action:

Drag the Action into the workflow and press the settings button on it.
To loop over all Alarms of an Alarm-array we use this mapping:
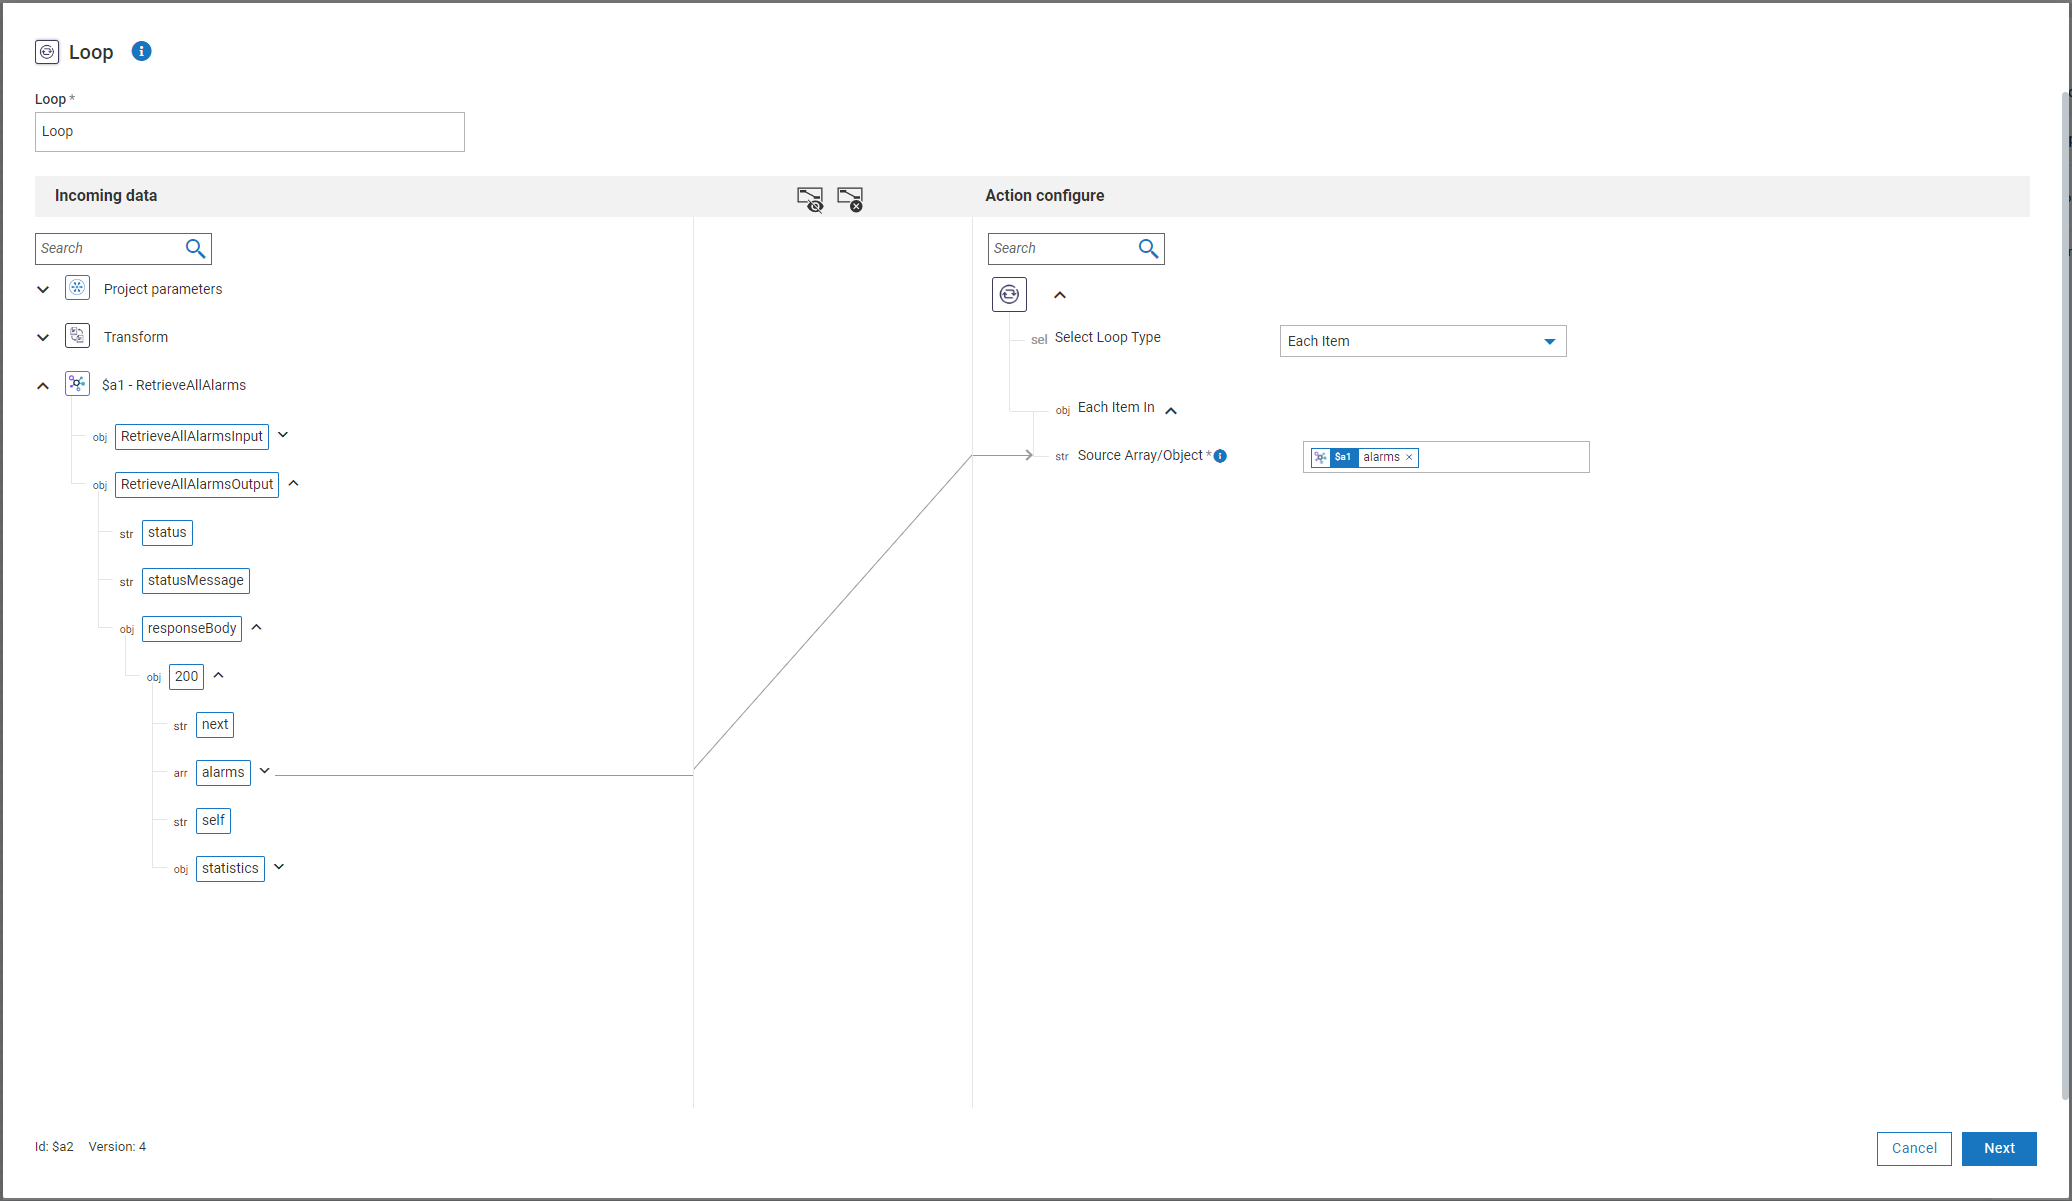
On the right-hand side, ensure that the loop type is set to “Each Item”. Then drag the Alarms-Array to the “Source Array/Object”-Field. You may need to expand the tree on the left side to be able to see the array.
After finishing the mapping we can press “next”, and then “done” on the following page.
Then go into the loop, by pressing the Loop button on it.
This will open an overlay, that looks the same as a new workflow. Every action in there will be executed for each element in the array.
- Getting every Managed Object for the Alarm


The Loop-Overlay should look just like this now. From here you can go ahead and bring in other Systems to integrate your data.
These are just some actions that can be used within webMethods.io for any System Integration. WebMethods.io holds a lot of Connectors for a large variety of systems.
Get creative and build your next Integration using the Cumulocity IoT Connector and webMethods.io. ![]()
Helpful Tips for working with webMethods.io Integration
When working with webMethods.io there are some small caveats to be aware of, as well as some best practices that can really help you with the creation of good, easy-to-maintain integrations. Here are a few of the most important points to remember:
1. Custom Properties
The Datatype for custom fragments is not fully ui-supported in webMethods.io Integration. Therefore we have to apply a little workaround to use it.
There are two different ways to do it. Both are working with the transformation function within the action mapping.
Just create one of the following transformations:
JSON-Parse:
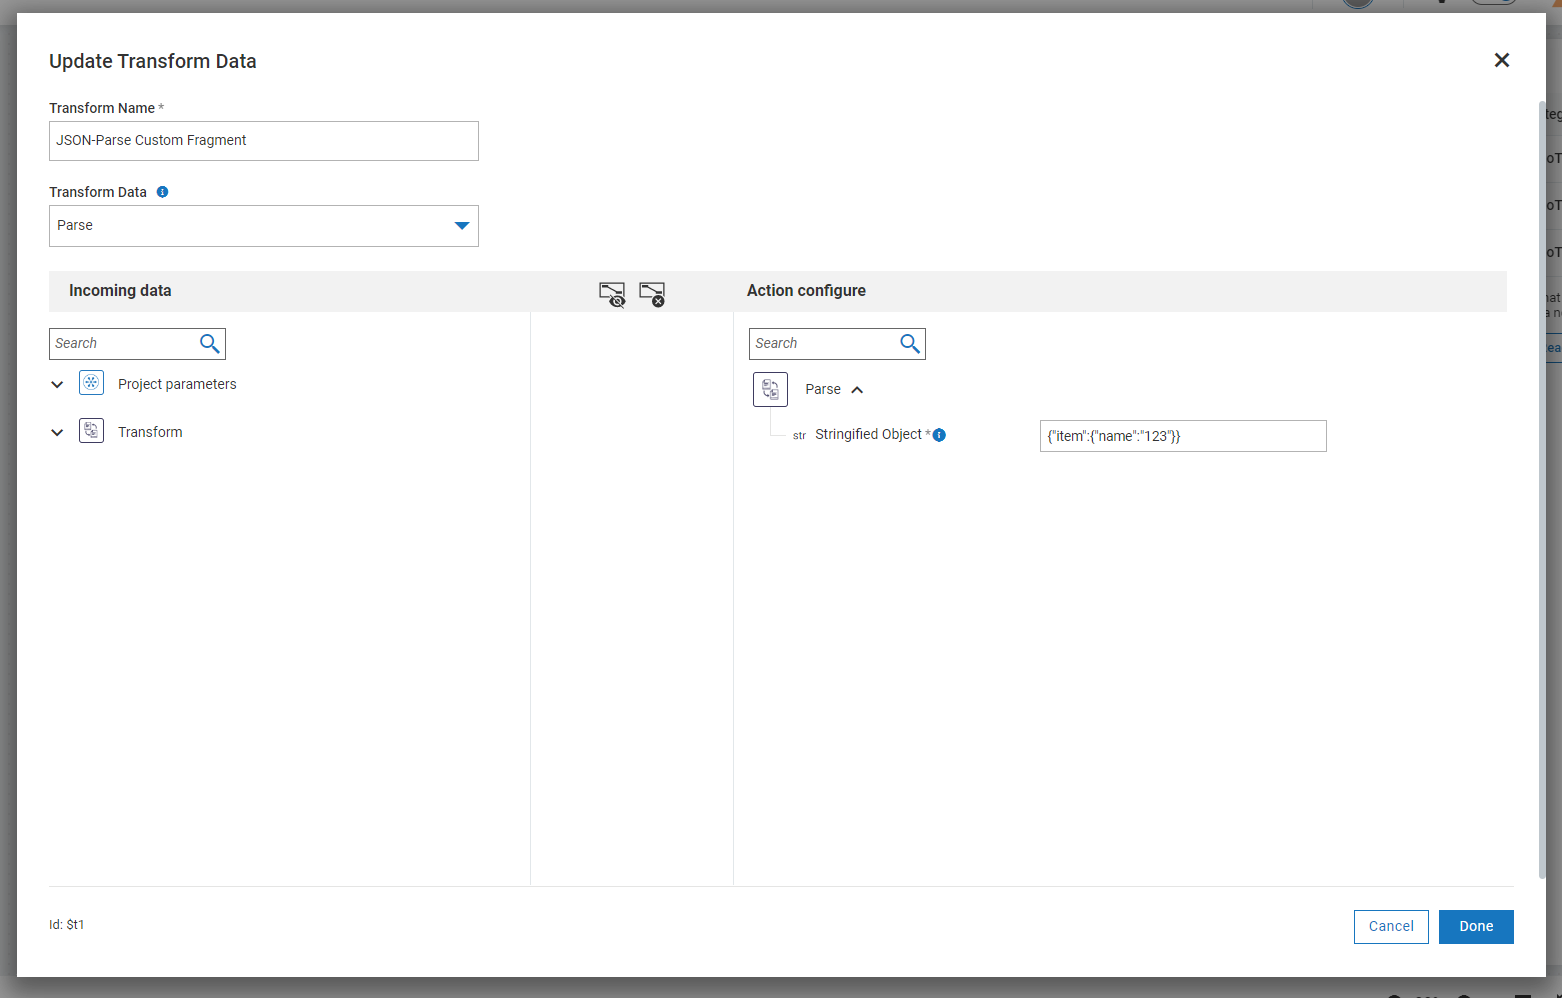
This transformation makes use of the “JSON-Parse” Transform-step. The custom fragment can be entered as a JSON string and will be parsed to an IntegrationServer-Doctype.
Node.js Object export:

This is the same transformation as above, it just uses the Node.js transformation step. The custom Object needs to be defined within Node.js.
Either one of the Outputs of the transformation step can then just be mapped to the custom fragment field within the mapping view of the action like this:

2. Cumulocity as Trigger for the Integration
We expanded the Cumulocity IoT Connector capabilities by also building a Trigger. More information on the Trigger and how it can be included within an Integration can be found in this article.
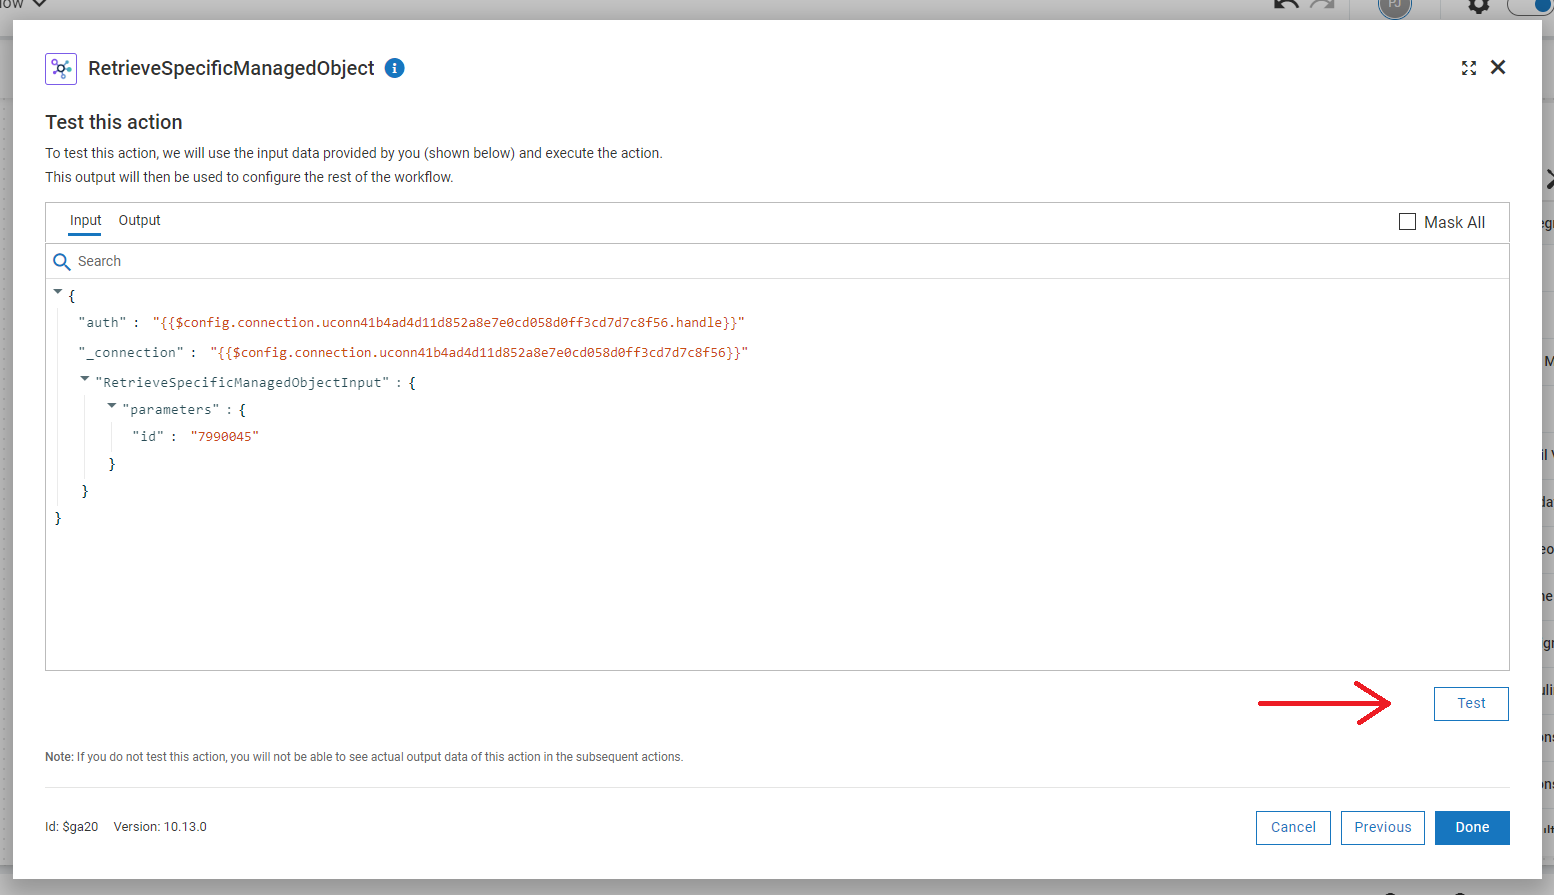
3. Test Button
Always make sure to press the “Test”-Button on the last page of a Action-Configuration to test the Action execution. This will show you the output of a test run and also gives you the ability to use the output of this test run for the mapping in other actions.
Next steps
Try it out. ![]()
Feel free to create any integration you want and let us know about it. We are always looking for areas where we can make improvements, and use cases that can benefit from this work.
A free tenant for webMethods.io can be claimed here.