The Basics: Terminology
Workflow
A workflow is a connection between two or more web apps or services. Creating a workflow means defining the steps of a recurring task that you want to automate. You define these steps once, and webMethods.io Integration platform will automate the execution for you, every time. In simple words, creating a workflow is like defining your conditions:
‘When an event occurs in ‘Service A’, do something in ‘Service B’, and (optionally) pass on the data to ‘Service C’, ‘Service D’, and ‘Service E’.
Let us look at an example workflow to understand this a little better.
When a new note is created in my Evernote account, translate the note in Spanish (using Google Translate Text), and send the translated text to my Gmail account.

Here is how it works.
The workflow keeps checking your Evernote account regularly. As soon as a new note is created, it extracts the body text and converts it to Spanish using Google Translate Text. This translated text will be then sent to your Gmail account. All this will be done automatically, within seconds, without requiring any manual intervention.
This is an example of a simple workflow. You can create more complex workflows by using many operations in single workflow.
To learn how to create your first workflow, refer to our step-by-step guide.
Trigger
A trigger automatically launches a workflow when a defined event happens. So in the previous example, Evernote is the trigger.
Each workflow can have only one trigger.
webMethods.io Integration offers two types of triggers:
Polling Trigger: The Polling trigger checks for changes in external services and applications periodically, at regular intervals of 5 minutes. They may not send data to webMethods.io Integration in real-time. All the polling triggers are marked with a 'Clock' icon in the Triggers list.
Webhook Trigger: The Webhook trigger keeps checking for updates continuously and sends data to webMethods.io Integration in real-time, which ensures that your workflow execution happens as soon as the specified event occurs in an external app or service.

Read more about Triggers.
Action
An action specifies the tasks that you want the workflow to perform. For example, in the workflow that we discussed earlier, Google Translator and Gmail are the actions.
Unlike Triggers, multiple actions from different services can be added in the same workflow. Each connector has several actions that you can use.
webMethods.io Integration offers four categories of actions based on their usage:
Services

Utility

Premium

Custom

Read more about Actions.
Project
A project corresponds to the folder that organizes all your workflows. Every webMethods.io Integration tenant has a Default project. A user can choose to create additional projects as per their requirements. When you add a workflow to a project, all the configurations associated with that workflow are also stored inside the project.
Learn more about Projects.
Tenant
Tenant is at the top of the hierarchy in your webMethods.io Integration account. It encapsulates users, projects, and consequently, the workflows within the projects, allowing you to centrally manage all your resources with ease.
Account
An account is a process of granting permission to webMethods.io Integration to perform certain tasks in third-party apps or services. So, for instance, if you use an action related to Gmail in your workflow, you will have to first login to your Gmail account, and then authorize webMethods.io Integration to perform certain tasks on your behalf.

All accounts created in webMethods.io Integration have a global scope, which means that the authorization created for a particular service can be used for performing other actions of this service across all workflows in your account.
Know more about Accounts.
Conditions
Conditions allow you to set multiple conditions between two actions or between a trigger and an action in a workflow. The workflow proceeds only if the specified conditions are met. While defining a condition, you need to specify an ‘input’, an ‘a condition, and an ‘expected value’.
Suppose that you want to be notified about new notes on Evernote only if the content contains the word ‘lead’. In this case, content will be the input, contains will be the condition, and lead will be the expected value. The input that you use in conditions is usually the output of the preceding action or trigger.

Learn how to set up Conditions.
Filters
Filters allow you to add conditions on the trigger in your workflow. Once you set up a filter, the workflow will proceed only if the specified conditions are met. The Filters window can be accessed from the output screen of the trigger, after you have tested it.

Project Parameters
Project Parameters let you set custom key-value pairs for your projects and eliminate the need to enter a particular value over and over again. Once you set a parameter, you can use it in all workflows of that project with a single click.

For instance, if you want to send multiple emails to the same individual, you can define a parameter with ‘Email’ as the key, and their email address as the value. This allows you to insert the key-value pair as an input in all your workflows, without having to type the whole email ID repeatedly.
Get started with using Project Parameters.
Webhook
Webhook is one of the many ways to integrate webMethods.io Integration with various external applications and services. webMethods.io Integration supports incoming webhooks to allow external sources to post notifications about specific events.
If webhook is enabled for a workflow, webMethods.io Integration generates a unique webhook URL for that workflow, which you need to provide to the desired external application. As soon as an event occurs in this external application, it sends a JSON payload to webMethods.io Integration containing the details of the event via an HTTP POST request. This payload can then be used in your workflow.

A webhook can work as a trigger for your workflow. Instead of setting a trigger, you can simply add a Webhook to your workflow canvas and provide the webhook URL to an external source. For instance, you can provide the webhook URL to Evernote, and define that the URL should be notified whenever a new note is created in your account. With this, every time a note is added in your account, Evernote will make an HTTP POST request with the details of the new note and trigger off the workflow immediately.
To understand how it works, refer to our Webhooks Guide.
Container
A container is an isolated run-time environment. It contains all the dependencies including the configuration files, binaries, system libraries, code, etc., required to run a workflow. The size of the container determines the execution speed of your workflows. The bigger the size, the better is the speed. Currently, the available container sizes are 256 MB and 512 MB.

The Container eliminates the differences in OS distributions and underlying infrastructure, allowing webMethods.io Integration to run on all systems in a standard manner. You can view or change your existing container size from the Execution Settings section under your Workflow Settings.
Read more about Container.
The Basics: Understanding the GUI
The webMethods.io Integration Home Screen is the first page that you see when you log in to your tenant. The home screen provides you an overview of your tenant and its overall usage. Here are the main components that make up the webMethods.io Integration home screen:
- Projects
- Monitor
- Recipes
- Notifications
- Documentation
- App switcher
- Tenant settings

Let us understand these different components in detail.
1. Projects
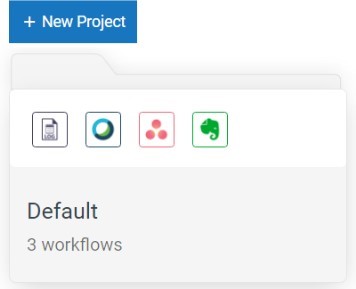
All your existing projects appear on the homescreen in the form of folders. Each folder displays the name of the project and the number of workflows it contains. The icons that appear on the folder are the connectors or services being used in that project’s workflows.

After signing up, all tenants are provided with a Default project. You can create a new project by clicking on the + New Project button.
To change the name of the project or delete the project, click on the vertical ellipsis icon on the top-right hand side of the project folder.

Read more about Projects.
When you click on a project folder, you will be redirected to the individual page of the project. Let us take a look at all the components here.
- Switch Projects: The dropdown menu lets you switch between various projects easily.
-
Workflows: The ‘Workflows’ option lets you view and modify all the workflows in your project. Every workflow card displays the name of the workflow, its last modified date and the number of times it has been executed. The card also contains a toggle button to activate or deactivate the workflow.

You can clone the workflow to another project, export it to your local storage, and delete it using the vertical ellipsis icon on the workflow card. Hovering over the card gives you the option to either view or edit the workflow.

- Configurations: This allows you to create and manage the webhooks, accounts, triggers and parameters associated with the different workflows of the project.
- Logs: The ‘Logs’ link displays a list of all the activities performed on the workflows in the project.
2. Monitor
The Monitor section offers four tabs from where you can perform these operations:
-
Dashboard
This section lets you track the total credit consumption and workflow executions for your tenant.
-
Audit Logs
The Audit Logs keep a record of all the activities and changes performed by all the users of your tenant. Learn more about Audit Logs.
-
Activity Logs
The Activity Logs lets you view the sequence of all the activities related to the workflows of your account. Read more about Activity Logs.
-
Alert Rules
This section lets you define rules for sending emails to specific users to notify them about the status of a workflow execution. Know more about Alert Rules.
3. Recipes
You can import workflows to webMethods.io Integration using the Recipes section. Recipes offer you access to public workflows shared by webMethods.io Integration Admin. You can import any of these workflows to your projects.


Know more about Recipes.
4. Notifications
The notification icon displays the list of recent notifications related to your tenant’s workflows. New notifications are indicated by a red dot on the top of the notification icon.

5. Documentation
The question mark icon takes you to the documentation site where you can find more information about the features and functionalities of webMethods.io Integration platform.
6. App Switcher
The App Switcher icon lets you switch between webMethods.io Integration platform, other Software AG Cloud products that you have signed up for, webMethods.io Flow Editor, and My Cloud with a single click. On My Cloud, you will find links to other Software AG Cloud products and the Administration settings.

7. Tenant Settings
From this section, you can view and manage your tenant settings. It allows you to:
- View tenant details, create new tenant roles, view existing users and assign them roles
- Get the latest updates about webMethods.io Integration
- View credit consumption and workflow execution statistics
- Sign out of your tenant

Read more about Tenant Settings.
The Basics: Accounts and Settings
Registration Process
Any user can register with webMethods.io Integration using this sign up link. During registration, the user needs to provide a Cloud Name, that is, their Tenant ID. In all subsequent sessions, the user must enter this ID to access their Software Cloud instances.
Tenant Settings

webMethods.io Integration allows you to centrally view and manage the settings of your tenant. To access your Tenant Settings, click on the profile icon located at the top-right corner of the home screen, and select Settings from the list of options that appear.
There are 3 tabs listed here:
- My Information: View your tenant details such as Email ID, tenant name, roles, plan and developer key.
- Roles: A role is a set of permissions that you assign to a user. From this tab, the tenant owner and the admin can view existing roles and also add new roles.
- Users: View existing users along with their assigned roles.
Container
The Container is an isolated run-time environment that lets you control the execution speed of your workflows. Understand what a container is, how it works, and how to select container size for your workflow executions.
Activity Logs
Activity Logs is a set of records that contain the sequence of all the activities related to the workflows of your tenant. The log records include details such as the timestamp, title, execution status as well as an option to view the detailed log.

There are two ways in which you can access the Activity Logs:
- Access workflow execution log from the canvas
- Access all workflow related logs from the Activity Logs page
Metrics
The Metrics page gives you a quick overview of the credits usage of your webMethods.io Integration account. To access this page, click on the profile icon and select Metrics.
The Metrics page is divided into three main sections:
- Monthly credits usage indicator
- Line graph
- Integration specific credits usage details
Audit Logs
The Audit Logs section maintains a record of all the actions performed within a tenant, including details such as the type of action performed, the user performing the action, and the date/time. You can retrieve specific logs by applying filters based on Project, Workflow, or Alert Rule.
The Basics: Data Access and Security
Security is a critical part of webMethods.io Integration. The platform offers advanced security tools to help you set access controls and securely access business data.
Firewall Friendly IPs
webMethods.io Integration provides a list of public IP addresses that you can whitelist to access firewall- protected data.
Data Masking
Add an extra layer of security to your application data by masking some or all keys of the input and output. Learn how to mask and unmask data.

Here is a list of developer guides to help you gain an in-depth understanding of the most popular features in webMethods.io Integration.
Connector Builder
Create custom connectors (a set of triggers and actions) with our developer platform and share it with other users. If you have a private API, webMethods.io Integration allows you to create custom triggers and actions for those APIs using the Connector Builder.
The Connector Builder is a custom Node.js application that you can build between Node versions 4.x.x and 8.14.X., using any web service’s APIs. Once you deploy the application on webMethods.io integration, it is first validated and later made available to you locally.
Node.js
While webMethods.io Integration provides 1000+ actions for your workflows, you can also create your own custom action using Node.js action. It provides an action builder that lets you insert custom code and create actions that look and work exactly the way other actions do.

Webhook
Integrate your webMethods.io Integration workflows with external web services and applications using webhooks. A webhook is a user-defined HTTP callback that allows third-party applications to notify webMethods.io Integration about specific events. Understand what webhooks are and how they work.
HTTP Request
The HTTP action allows you to make an HTTP request to your server. Learn how to configure the HTTP action in your workflows.

Parameterized Authorization
Pass authorizations as parameters to securely share a single workflow with multiple users. Parameterized authorization allows you to change the accounts you want to access on the fly based on the encrypted authorization you send in your webhook. Understand how Parameterized Authorizations work.
Hybrid Integration
The Hybrid Integration feature allows you to access your on-premise applications that are normally inaccessible due to security restrictions, firewalls, or licensing issues. The feature establishes a secure connection between webMethods.io Integration platform and your server behind the firewall, allowing you to add your on-premise applications and subsequently access their data in your workflows. Learn more about Hybrid Integration.

Flow Editor
webMethods.io Flow Editor provides you with a graphical drag-and-drop tool to help you create complex integrations and use them in your workflows. The Flow Editor has rich data mapping, a familiar debugging mechanism, a large collection of built-in services, and dashboards to monitor integrations. Learn how to create an integration using the Flow Editor.
Read next: webMethods.io Integration tutorial – Developer Guide